


Last updated on January 23rd, 2024 at 02:17 am
This tutorial will show you how to add a watermark on a video with VLC Media Player. Step-by-step instructions are given.
One of the most popular AV tools out there is the VLC Media Player.
It’s well-known as a versatile media player. It can play almost any audio or video format out there.
The best part is it’s free.
However, not many know that it also has video editing capabilities.
You can cut video clips, convert video to another format and even extract audio from a video clip.
So, for basic video editing tasks, you don’t have to install a dedicated video editor in your computer.
This would include adding a watermark to your video.
Adding a watermark to your video with VLC is not as straightforward as it is on a video editing program. Many of the features lie hidden in the player.
Here are the steps on how to add a watermark to your video with VLC Media Player.
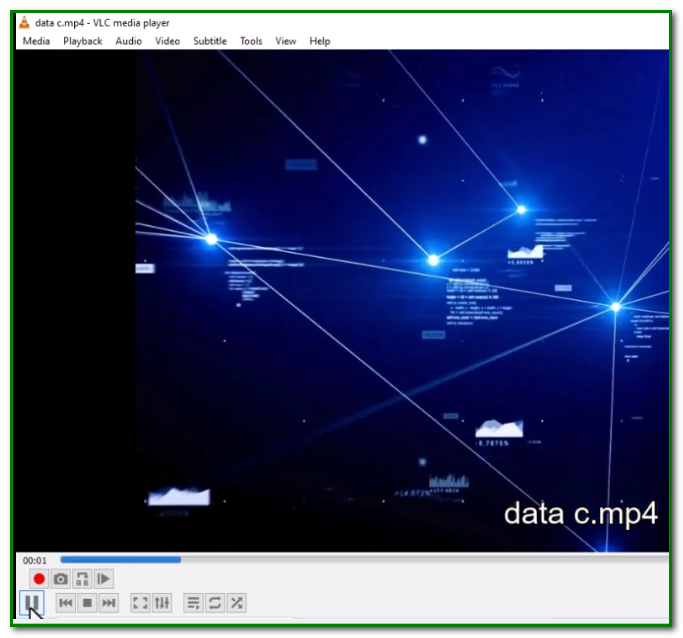
Step 1 – Open Your Video
Open your video in VLC Media Player and pause it.
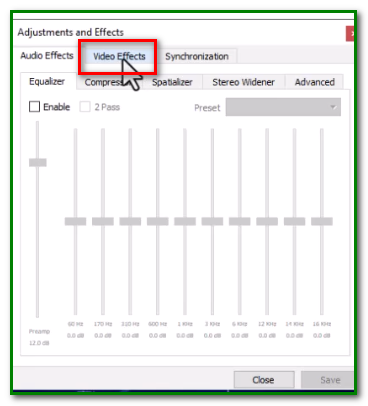
Step 2- Go to Tools
From the Tools menu, select Effects and Filters.

Step 3 – Choose Video Effects
Under Adjustments and Effects choose Video Effects.
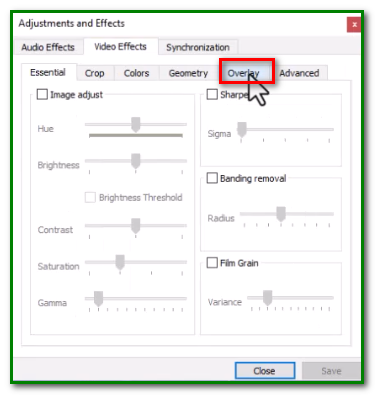
Step 4 – Go to Overlay
Select Overlay from the Video Effects menu.
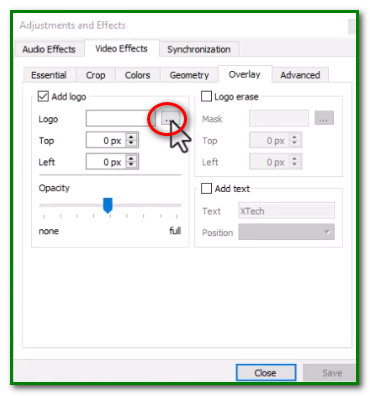
Step 5 – Enable Add logo
Under the Overlay menu, tick on Add logo.
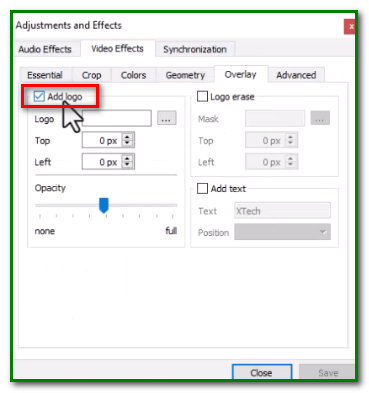
Click on the 3 horizontal dots to select your logo.
Step 6 – Look for your Logo
Make sure your logo is in the transparent PNG format. Otherwise, the white background on it will be visible and look awkward as a watermark.
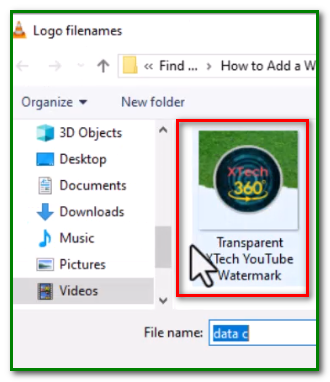
If your logo is in the JPEG format or non-transparent PNG, you can use an online PNG transparency creator.
It will quickly remove the white background on your logo and provide you with a PNG file.
Watch the video below to see how it’s done.
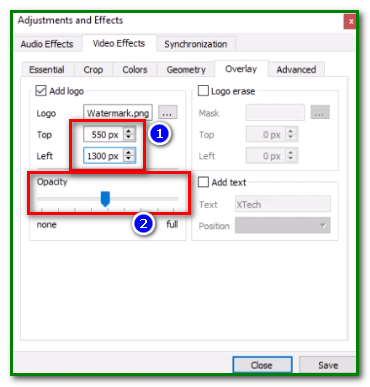
Step 7 – Enter your Top and left settings.
After your logo is uploaded, you want to set its top and left positions.
Here we want to enter 550 and 1300. You are free to use your settings and play around with positioning until you’re satisfied.
We can also adjust the opacity so that the watermark isn’t distracting.
Once you’re done, hit save.
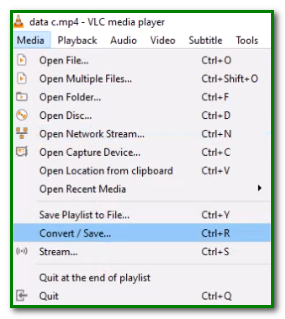
Step 8 – Go to Convert/Save
Click on Media and choose Convert/Save.
Step 9 – Add your your Video
After adding your video, click on Convert.

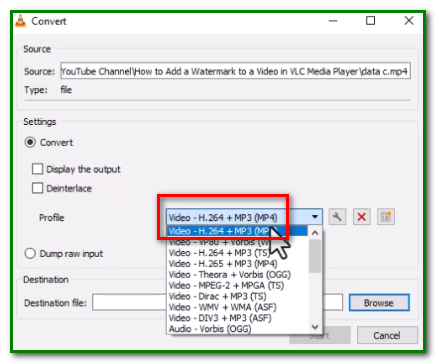
Step 10 – Select MP4 as your Profile- Select
Under profile select H.264 +MP3 (MP4) as your preferred Profile.
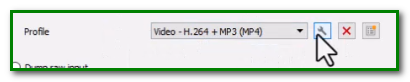
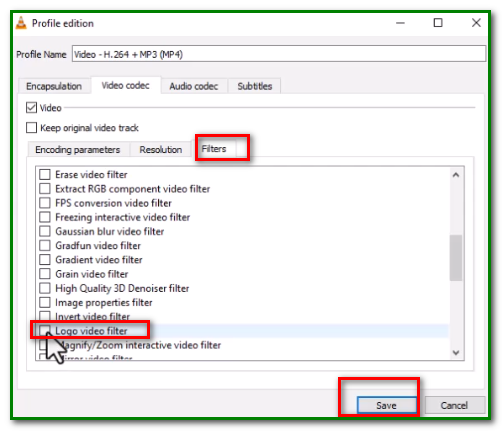
Step 11 – Select a Video Filter
To do this click on the wrench icon.
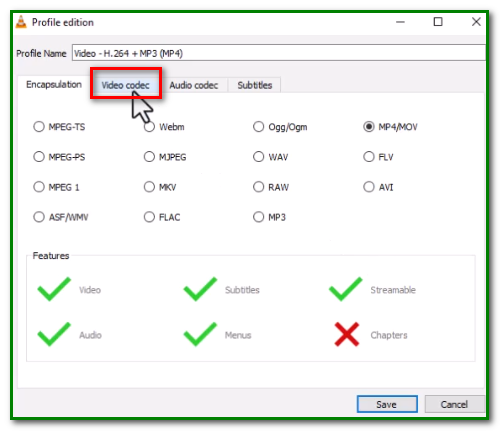
Then choose Video codec.
Choose Filters and hit Save.
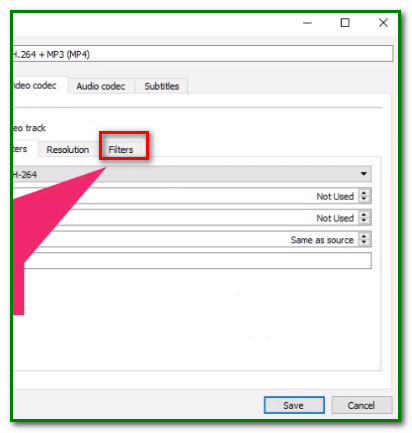
Next, scroll down and select the logo video filter. Then hit Save.
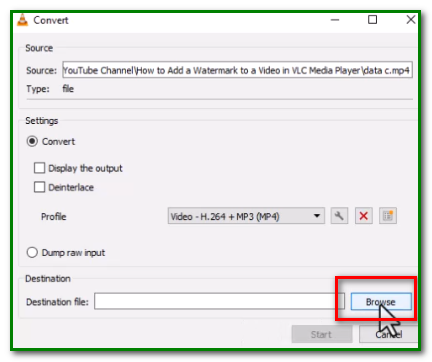
Step 12 – Select your Output Folder
Click on Browse to choose a folder where you want your video to be stored. Name your video file.
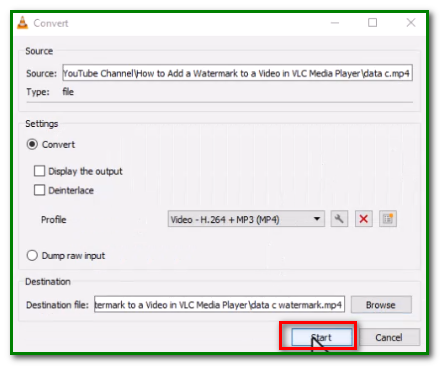
Then hit Save and click Start.
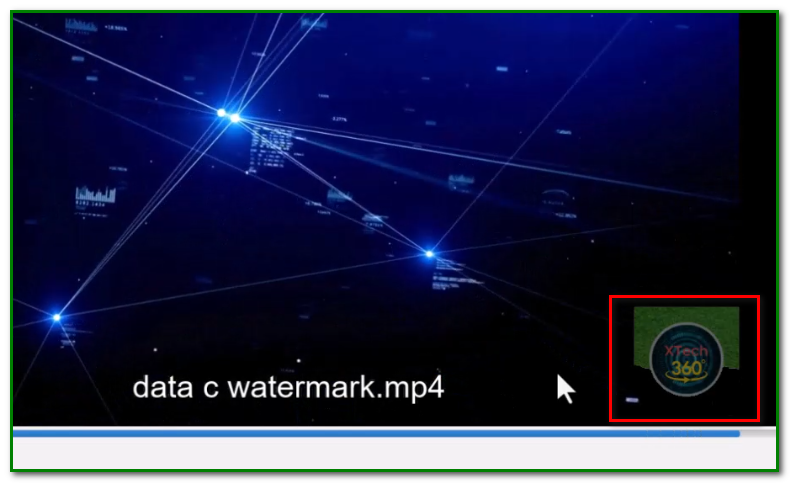
Your video will be processed. See blue line below.
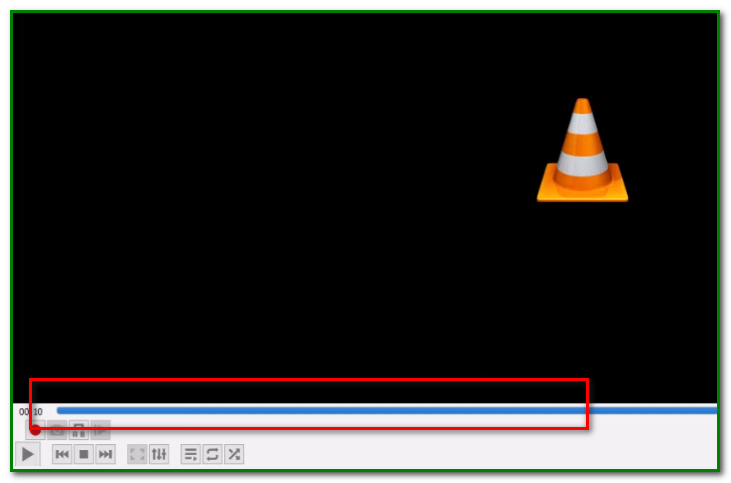
Step 13 – Play your Video
You can then locate the file in your selected folder and play the video.
Video Guide
Watch this video to refresh your understanding of how to add a watermark on a video with VLC Media Player.