


Last updated on January 23rd, 2024 at 02:31 am
Youtubers look for different ways to increase viewer engagement. This is important to stand apart from the competition.
One of the ways, they do it is include subtitles in their videos.
Subtitles are useful in many ways. Although English is widely spoken and understood worldwide, written English is more accessible to many.
This is because English is spoken with different accents the world over. For example, English spoken in the US may not be totally understood by those where English is a foreign language.
The inclusion of subtitles will help more of these kinds of viewers to engage with your video.
The inclusion of subtitles will also benefit the hearing-impaired. Many YouTube videos overlook the hearing-impaired as a potential audience.
Millions of people around the world have hearing-related problems, according to WHO. They would of course welcome videos that come with subtitles.
Also, there will be situations where you can’t watch a video with the audio on without disturbing others, maybe in crowded places or in places where you can’t hear the audio well. In these instances, subtitles would be a great help.
So, if you are interested in increasing video engagement, thereby increasing views, you should seriously consider including subtitles in your Videos.
According to YouTube videos with captions or subtitles enjoy a higher watch time compared to those with them.
Youtube allows you to include Subtitles with your uploaded videos. There’s a facility to include subtitles in a foreign language, too, though you may not use it.
We’ll explain below the three ways on how you can include subtitles in your YouTube videos.
Let’s now look at how you can add subtitles to your YouTube video.
Generating Subtitles During Video Editing
You can generate subtitles during the video editing process. Most video editors have the facility to add closed captions or subtitles.
For example in Camtasia studio, there is a facility to add captions to your videos.
Later, when you export it you have the option to burn in the subtitles. This would be helpful if there’s no talking in the video.
For our cooking channel, we have our subtitles burned into the video.
With this option, the subtitles will appear permanently on the video. We used the burned-in subtitles because some viewers may not know how to turn on the captions when playing a YouTube video. They may assume that it’s a silent video.
You need not follow this route if there’s talking in your video.
You extract the subtitles as a separate file in a format supported by YouTube in most video editing programs. In Camtasia Studio, you can export subtitles in the .srt format. This format is supported by YouTube, as you’ll see below.
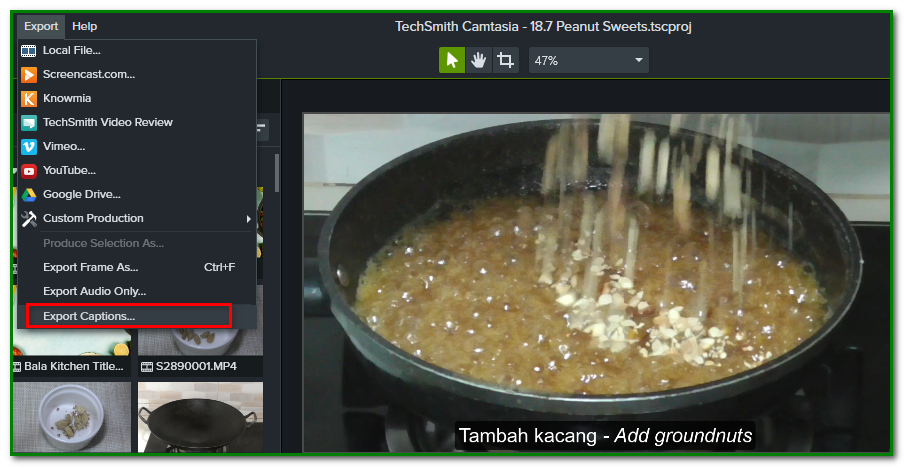
Many other video editing programs have this facility, too. In the case of Camtasia Studio, subtitles can be exported as Subrip or SAMI caption files.

Both these files are supported by YouTube. If your video editor outputs subtitle files in other formats, then you would have to check whether Youtube accepts them.
How to Add Subtitles to Your YouTube Video with a Subtitle File
So you have a supported subtitle file ready?
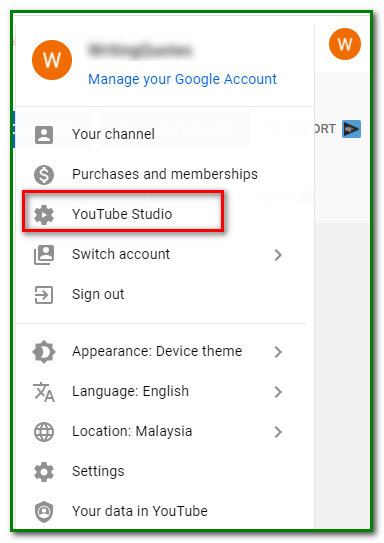
Log in to your YouTube account.
Once there, click on YouTube Studio from the drop-down menu.
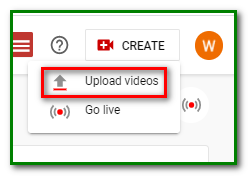
Then click on Create and upload your video if you’ve not already done so.
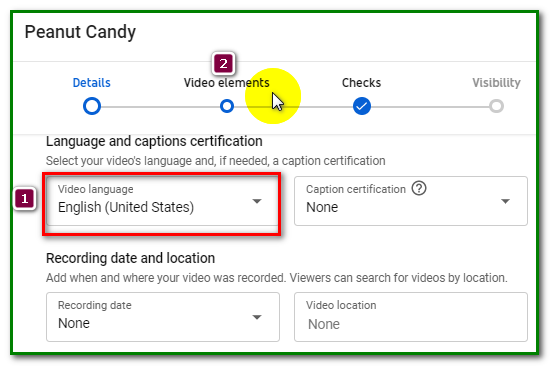
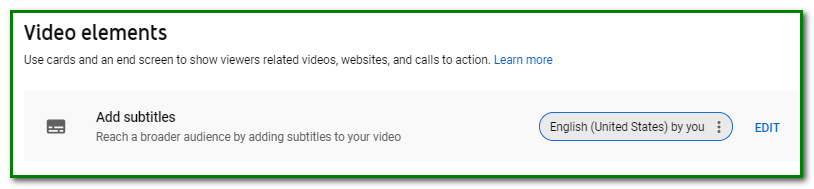
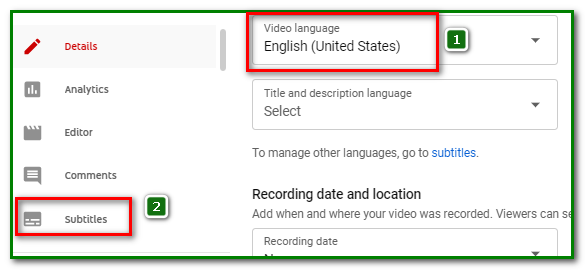
Once your video is uploaded, select your video language under Details. Then click on Video elements.
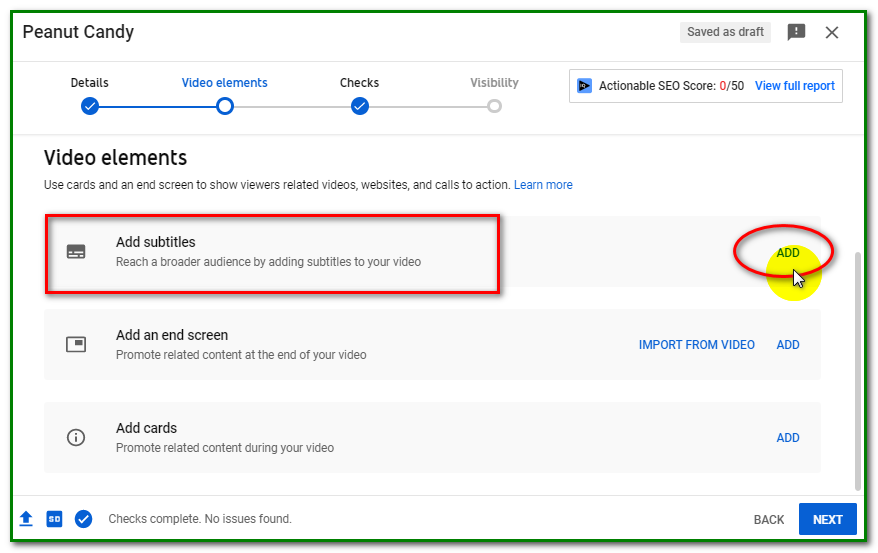
Under Video elements, click on Add Subtitles.
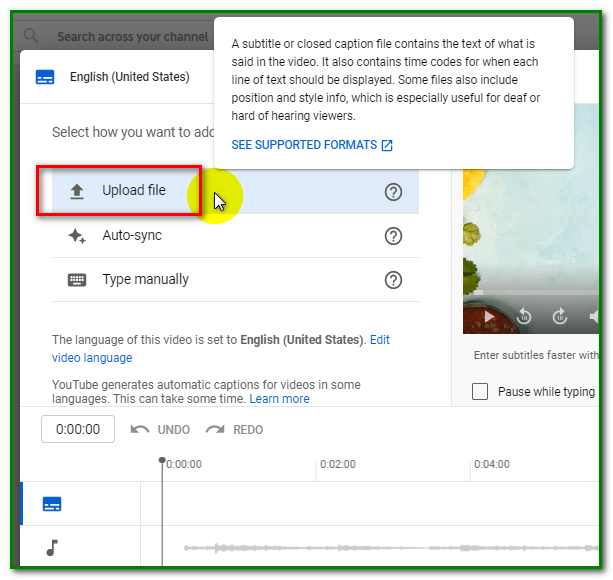
Then click on Upload file,
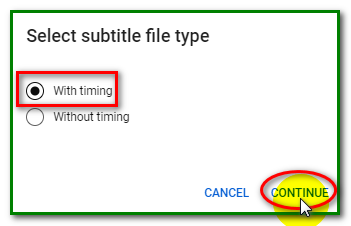
Choose With timing and click Continue.
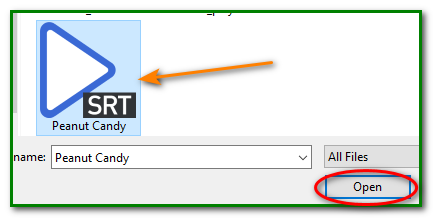
Select your subtitle file from your computer and click Open.
Your subtitle file will be uploaded within minutes.
Check to see whether the subtitles synchronize with the scene in the video.
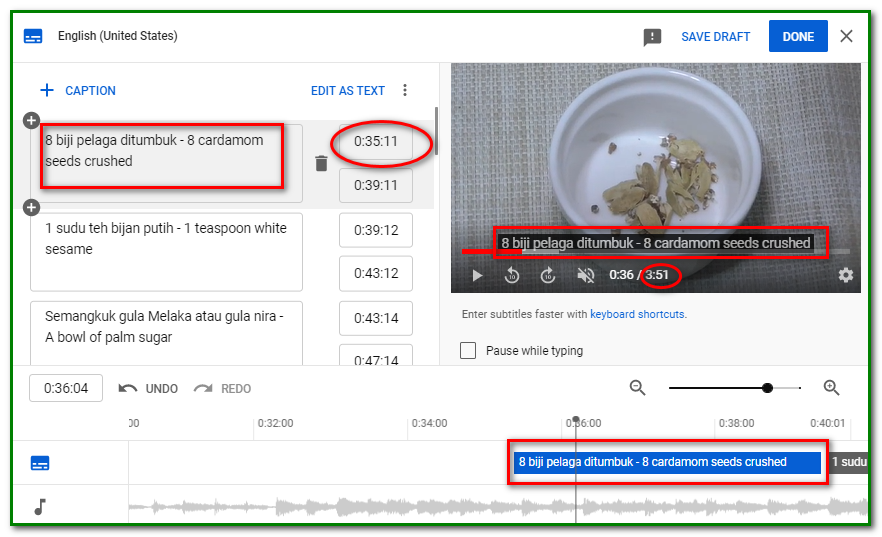
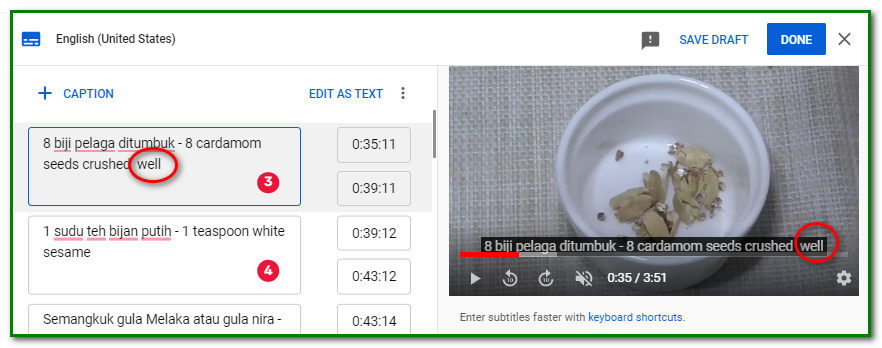
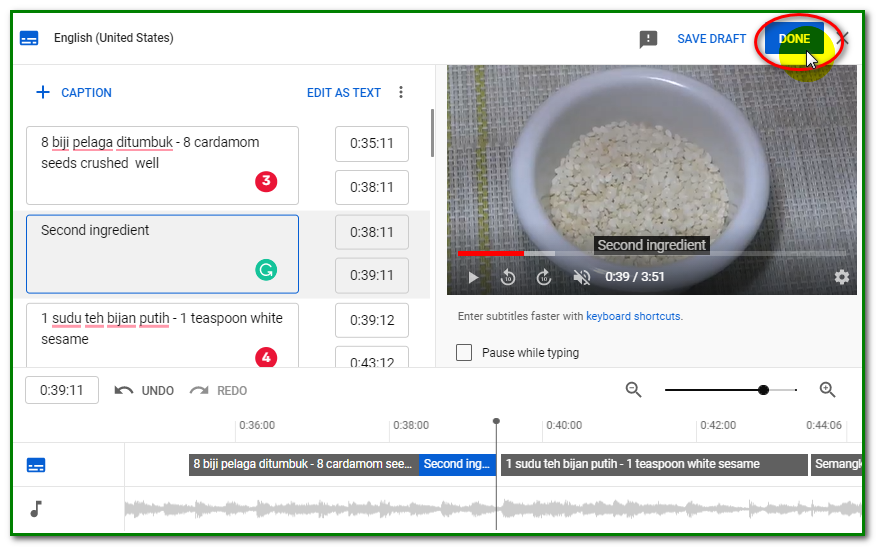
You can proceed to edit the text by clicking on the caption box.
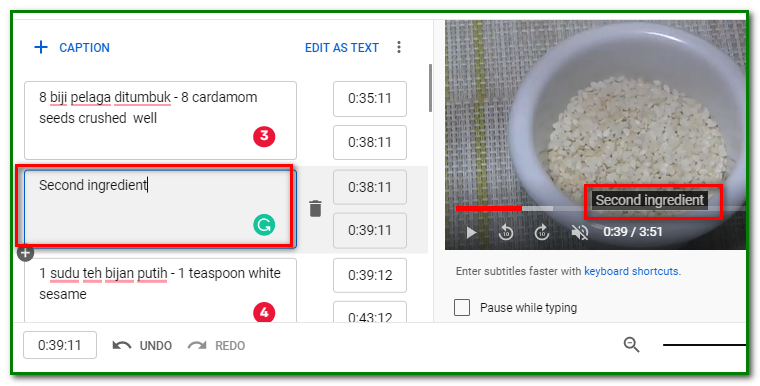
You can also add a new caption line in between two existing subtititles, by hovering you mouse over the end of a box until a blue + sign appears.

Click on the + sign and a box appears for you to add a new caption line. As you add it, the caption will appear on your video preview.
When you’re happy with your adjustments, click on Done if you’re ready to publish your video. You can also save it as a draft if you would like to continue editing the captions at a later time.
Back in the Video elements box, you can see that subtitles have been added.
If you want to delete the subtitles, click on the three vertical dots and hit delete. You can do this if you want to replace the existing subtitle file with another.

How to Add Subtitles to Your YouTube Video Automatically
You don’t necessarily need to have a subtitle file to include subtitles for your YouTube video. You can automatically add captions through YouTube Studio. This feature is useful if you can’t create a subtitle file with your video editor.
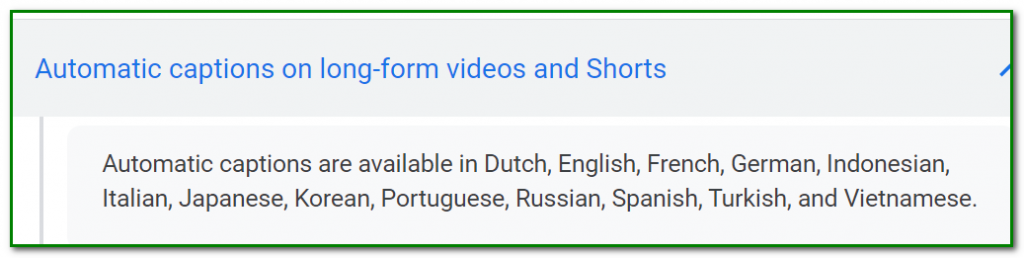
There’s a condition, though. Your audio must be of the language supported by YouTube for auto-captions.
The following languages are supported to add subtitles to your YouTube video automatically, according to YouTube.
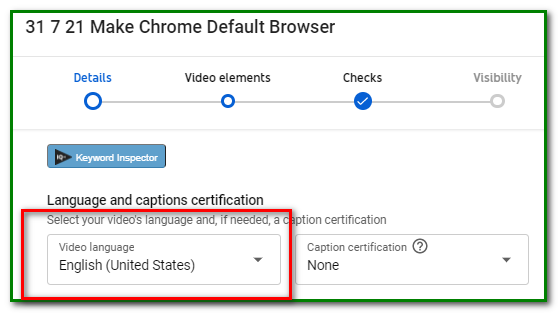
Then scroll down to Language and caption certification section. Choose Your Language under Video Details first.
Then click on Video elements and Add subtitles.

In the subtitle options choose Auto-sync.
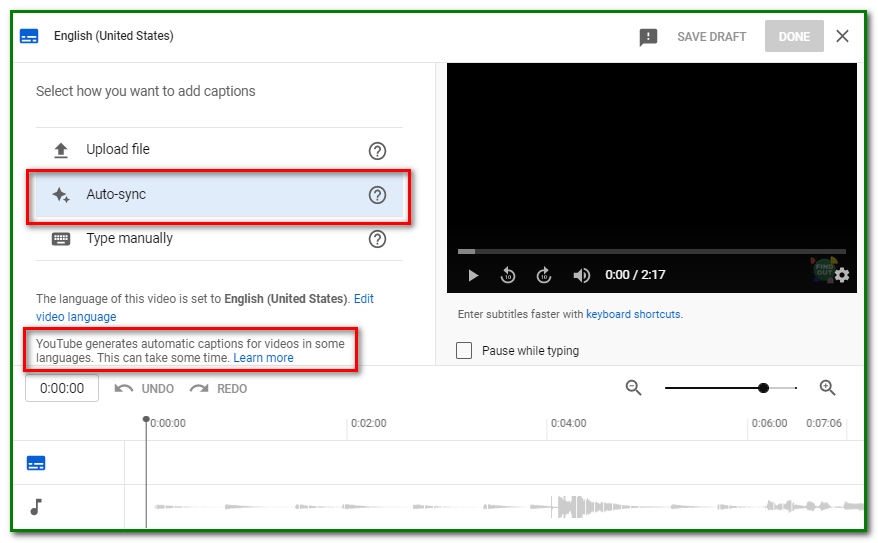
After selecting this option, click Done on the top right-hand corner. This will add subtitles to your YouTube video automatically, based on the words spoken in the video.
To check the auto-generated subtitles, click on Subtitles on the left panel of your YouTube Studio. Then click on Duplicate and Edit under Automatic Subtitles.
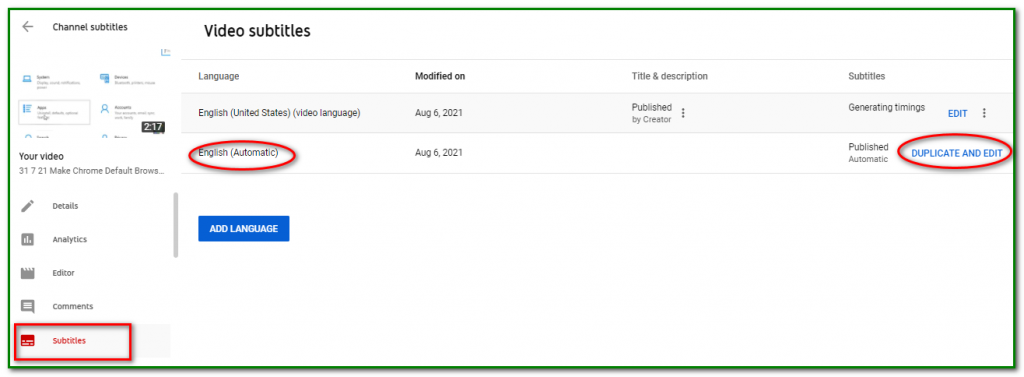
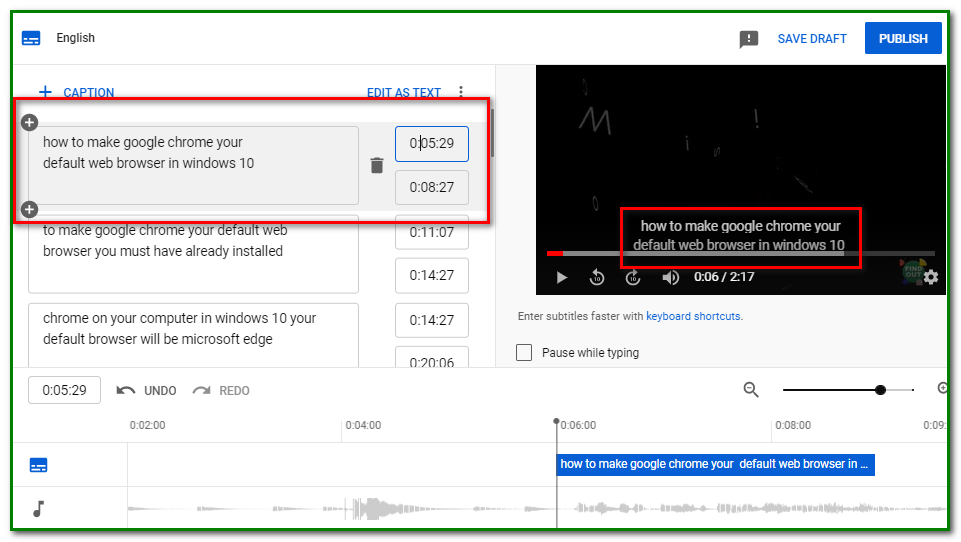
You’ll see the full text of the auto-captions. Click on Edit timings to see the time codes.

You can then proceed to play the video to see if the captions sync with the spoken audio. You can then edit the captions and change spelling mistakes, add punctuation, and so on.
To benefit from automatic captions, the pronunciation of your audio must be clear in the language you’ve selected.
How to Add Subtitles to Your YouTube Video Manually
You can manually type in subtitles for your video in YouTube Studio. If your language isn’t supported for auto-captions. This will require you to play your video and type what is spoken.
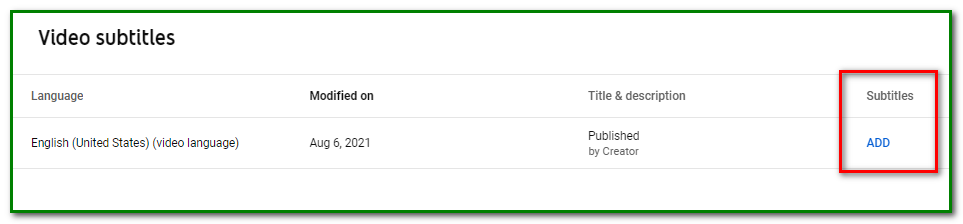
After selecting your language click on Subtitles on the left panel.
Then click on Add subtitles.
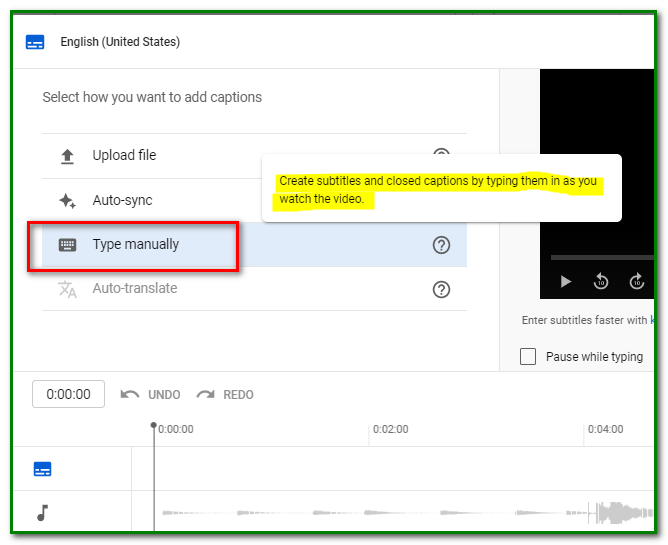
In the Subtitle options, choose Type manually.
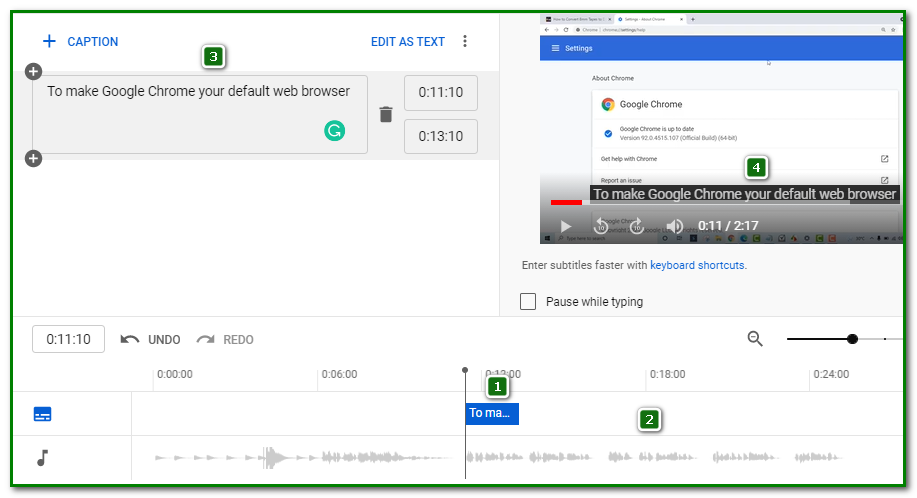
First, place the blue caption bar on the timeline where you want the first caption to start. By default, it will start at 0:00. You can drag it to any position you want.
Then play the video and listen to the audio. Pause the video when a sentence ends and type your caption into the caption box.
As soon as you do that, you’ll see the caption appearing on the video preview window.
Move on to the next block of narration and fill in the captions.
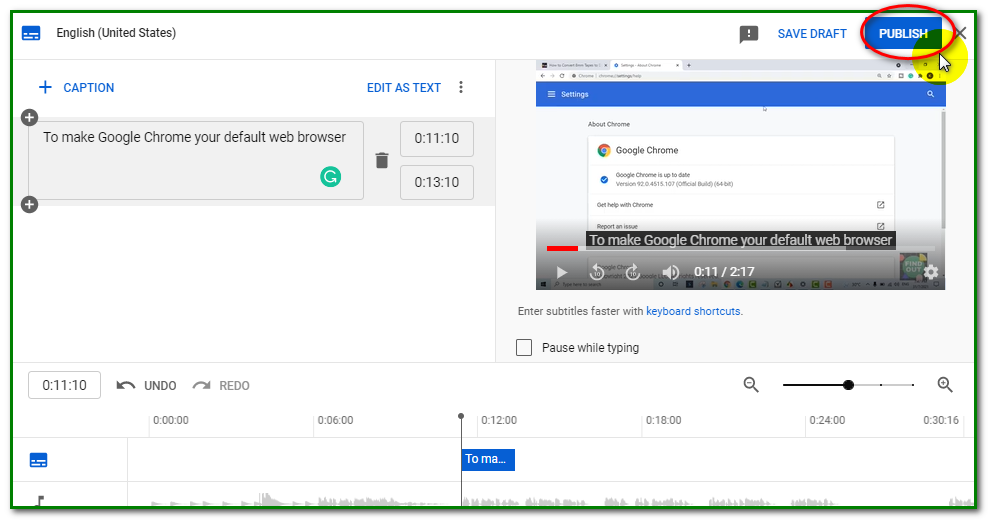
When you’re done, play back the audio to see if the captions sync with the audio. If you’re satisfied with the captions, hit publish. If you wish to make changes later, hit save draft.
You’ve seen the 3 options you can use to add subtitles to your YouTube video. Choose your preferred method and give it a try.