


Last updated on January 23rd, 2024 at 02:18 am
You’ve loaded a good-quality video file on VLC Media Player.
However, the quality of the video on playback isn’t satisfactory.
Let’s say you’ve opened a Full HD 1080p video. However, when you play it back, the quality you get is much lower.
Fret not, as there’s a way to fix the problem.
Here are the steps on how to change video quality in VLC Media Player.
Step 1 – Launch VLC
You can do this with or without opening a video file.

If a video file is opened you would want to pause it.
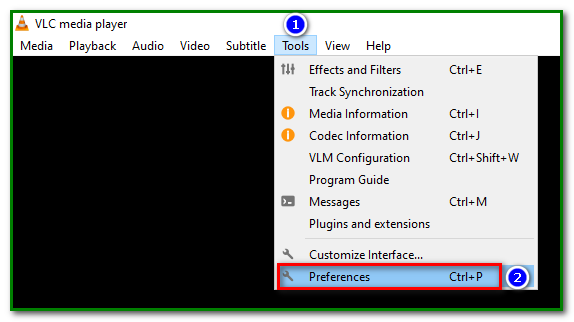
Step 2 – Next Click on Tools and Select Preferences
You’ll find Preferences at the bottom of the Tools menu.
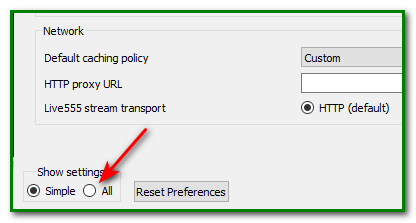
Then scroll down to the bottom to Show settings and select All. The default is Simple.
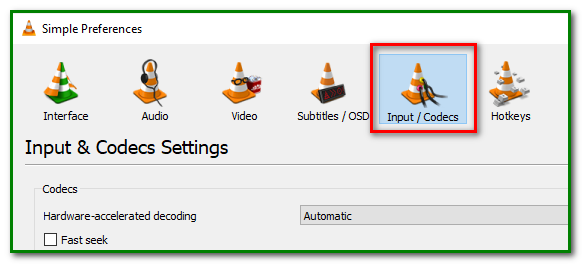
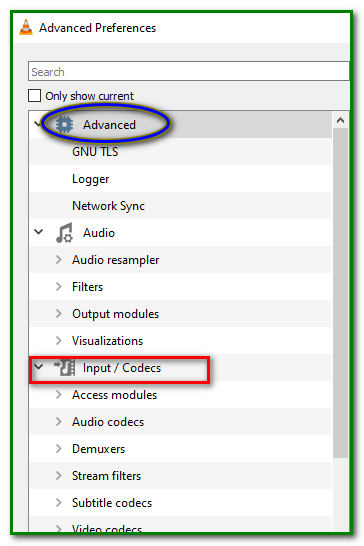
Step 4 – Select Input/Codecs
Under Advanced Settings select Input/Codecs.
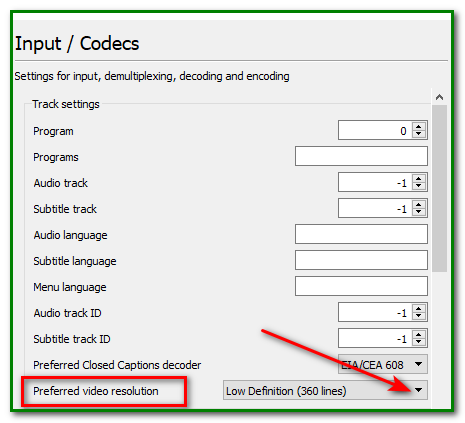
Step 5 – Choose Preferred Video Resolution
On the right-hand settings, choose your preferred video resolution and hit Save.
If a lower resolution is set, click on the drop-down arrow and select your preferred video resolution.
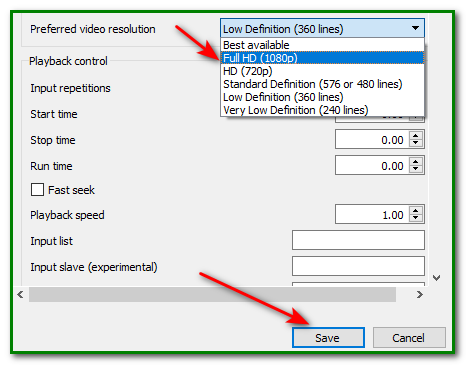
Your video should now be able to play in a higher resolution if the original video resolution setting was lower.
You’ll notice that the VLC Media player plays video at a maximum resolution of Full HD or 1080p.
Frequently Asked Questions
Can you Increase the Resolution of a 360p Video to 1080p?
You can set the maximum of 1080p for video resolution. However, your video will not play at Full HD resolution. Your video will be displayed at 360p despite the higher resolution setting.
Does this Video Resolution Setting Work with YouTube Videos?
Yes, you can apply it to YouTube videos you play on VLC Media Player. It should work on any video you play with VLC.
Watch the video below to see how it’s done.