Last updated on January 23rd, 2024 at 02:34 am
There will be times when you’ll not have access to lighting equipment to get the best video shots indoors.
Or you may have ready lighting equipment but do not have the time to set it up because you need to capture a spontaneous moment.
Or the situation could be you have to shoot indoors away from your studio in a place unfamiliar to you and have to do it quickly.
Today’s video cameras or camcorders are pretty sensitive to light and deliver acceptable video quality in natural light conditions.
Still, you’ll want to look at these tips on how to handle indoor lighting for video shooting.
Bright Room
If you’re shooting during the day, avoid placing your subject near a bright window.
This is an important tip to bear in mind when it comes to indoor lighting for video shooting
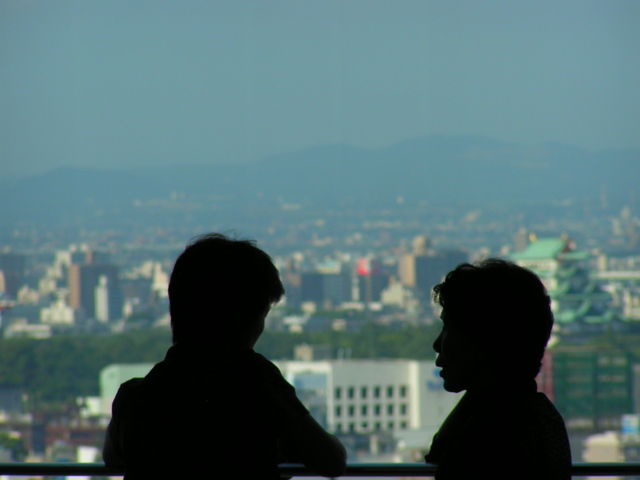
A subject standing with her back to the window with strong light coming from it will create a silhouette effect and cut a dark, stark figure.
Avoid placing the subject in a position where the source light is coming from the back. Instead, position the subject in a position where the available light comes from the front.
If for some reason, that’s not possible, compensate for the shortcoming by switching on as many lights as possible.
This would include turning on overhead fluorescent lights and even table lights and so on – to offset the significant amount of daylight or sunlight coming from the back of the subject.
Frame Your Shots Tighter
A workaround is you could frame your shots tighter so that you block out most of the light coming from the back.
In other words, have the subject fill up the major portion of your frame if that suits your purpose.
Reflector Trick
Here’s another fix you could try if you have a reflector handy.
Use the reflector to throw the light flowing in from the window to the character’s face.
Better still, have the character standing sideways against the light from the window. Then use the reflector to bounce the light onto the part of the face hidden from the window light.
Here’s a quick tip that would help you determine whether your subject’s face is well-lit. Look into your subject’s eye to see if there’s light reflecting off them. If there is then you may have found your lighting sweet spot.
Dark Room
You may find yourself in a room with insufficient lightning. With exposure wanting, you would want to open up your camera’s iris manually until you’re satisfied with the exposure you’re getting.
If this doesn’t quite work, you could slow down the shutter speed to get the brightness you desire.
A word of caution though with this tweak. You may end up with undesirable motion blur.
Sunlight vs Artificial Light
There will be times when you have to choose between sunlight and/or other lights available in the room, like incandescent or fluorescent.
When this happens, give sunlight the benefit of the doubt. Sunlight provides a better colour balance compared to artificial lights.
White Balance
Whatever the case, you should not forget to do a white balance on the key source light.
How do you go about doing a white balance? The easiest way is to place a white card before your subject, intercepting the light that’s falling on the subject.
Before you direct your camera to the white card, make sure you switch from your camera’s auto white balance to the manual setting.
Sometimes sunlight interferes with your ability to get the natural colours you desire for your shots. In this case, hang a black curtain at the window to prevent the light source from interfering with the other light sources. This would help you get a better colour balance for your video.
Uneven Lighting
What should you do if the intensity of the available light varies from spot to spot? In this case of uneven lighting, you should call the aid of your camera f-stop.
Here’s what you should do – write down the f-stop reading for the brightest spot. Then do the same for the darkest spot.
Then when you’re ready to shoot, manually set your f-stop to reading in between the two. This should help improve your shots.
If this doesn’t work well, try your camera backlight button as a last resort.
Night Lighting
If there’s ample indoor lighting when you’re shooting at night, make use of the flexibility of moving the subject or light around.
Whatever you do, avoid letting the light source creep into your frame. This is because table lights and floor lights have the tendency to create a halo surrounding the subject.
If you have a bright light in the room and it’s movable, like a strong table light, and if the ceiling is white, you could direct it at the ceiling to create a soft pool of light that floods the whole area.
Final Words
The above tips are suggestions for you to get the best video shots indoors when shooting with available light. They may work for you in most instances, but results aren’t guaranteed.
Getting the best shots indoors with available light is a trial-and-error process, especially if you’re a beginner, and with experience, you’ll minimize shortcomings.
So, be bold and try out these suggestions for indoor lighting for video shooting.


